今天
计划
食谱
购物
秋葵炒蛋 | GoChop
Back
简
Add to plan
秋葵炒蛋
Easy
嫩滑的秋葵配上蓬松的炒鸡蛋,简单调味,清爽又好吃,快手营养。
厨师长教你:“秋葵炒蛋”的家常做法,清脆爽口,营养美味
视频来源:
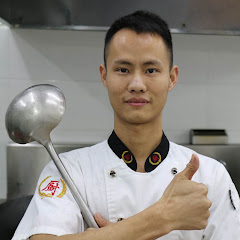
美食作家王刚
▶ YouTube
Watch full video on YouTube ↗
🥕
Ingredients
−
4
+
Cooking Steps
11
STEP 1 OF 11
清洗秋葵
USES
秋葵, blanched, sliced
(400 gram)
YouTube
美食作家王刚
Open on YouTube ↗
秋葵放入碗中,加盐和水,仔细搓洗,去掉表面的细绒毛。
STEP 2 OF 11
焯秋葵
USES
猪油
(0 as needed)
YouTube
美食作家王刚
Open on YouTube ↗
水烧开后加盐和少许猪油,放入秋葵焯至刚刚熟透捞出。
STEP 3 OF 11
过凉水切片
YouTube
美食作家王刚
Open on YouTube ↗
秋葵捞出后立刻放入凉水中降温,保持翠绿色,再切成薄圆片。
STEP 4 OF 11
打鸡蛋
USES
鸡蛋, whisked
(4 whole)
·
盐
(0.5 teaspoon)
YouTube
美食作家王刚
Open on YouTube ↗
鸡蛋打入碗中,加一小撮盐,搅打均匀。
STEP 5 OF 11
切洋葱丝
USES
洋葱, thinly shredded
(1 as needed)
YouTube
美食作家王刚
Open on YouTube ↗
洋葱切细丝,备用,炒的时候能增添甜味。
STEP 6 OF 11
热锅润锅
USES
食用油
(0 as needed)
YouTube
美食作家王刚
Open on YouTube ↗
锅烧热后倒入油转匀锅面,倒出旧油,再加入新鲜的油。
STEP 7 OF 11
炒鸡蛋
YouTube
美食作家王刚
Open on YouTube ↗
倒入蛋液,炒至金黄,用锅铲划散成小块,盛出备用。
STEP 8 OF 11
炒洋葱和秋葵
YouTube
美食作家王刚
Open on YouTube ↗
放入洋葱丝翻炒出香味,再加入秋葵片一起翻炒均匀。
STEP 9 OF 11
加酱油
USES
生抽, around the wok
(0.5 tablespoon)
YouTube
美食作家王刚
Open on YouTube ↗
沿锅边淋入酱油,快速翻炒,让香味散发出来。
STEP 10 OF 11
调味
USES
白胡椒粉
(0.5 teaspoon)
YouTube
美食作家王刚
Open on YouTube ↗
加入盐和胡椒粉,翻炒均匀,让调味分布均匀。
STEP 11 OF 11
合炒装盘
YouTube
美食作家王刚
Open on YouTube ↗
将炒好的鸡蛋倒回锅中,翻炒均匀,装盘上桌即可。
Did this recipe work for you?
Tastes good?
Loved it
Not really
Easy to follow?
Yes
No
今天
计划
食谱
购物